
How to Treat a Chipped Tooth at Home: Simple Solutions
One of the worst things that can happen when you're simply going about your day is accidentally chipping a tooth. I know this from experience. A few months ago, I was enjoying a crunchy snack, and suddenly, I felt a sharp pain in my tooth. After checking in the mirror, I realized that a small part of one of my front teeth had chipped. Naturally, I panicked a little and wondered what I should do right away.
Luckily, I didn’t have to rush to the dentist immediately—there are several ways to manage a chipped tooth at home before seeing a professional. If you’re in the same boat, don’t worry! While nothing substitutes professional dental care, there are practical steps you can take to reduce discomfort and prevent further damage until you can visit the dentist.
1. Assess the Damage to Your Tooth
The first step when you chip a tooth is to assess the damage. Is it a small, superficial chip that only affects the enamel, or is there a more serious fracture that could expose the pulp (the inner tissue of your tooth)? I found that in my case, it was a minor chip, so I didn’t experience much pain beyond the initial shock. But if your chip is larger or causes significant pain, it’s best to contact a dentist as soon as possible.
Here’s how you can assess your chipped tooth:
- Small Chip: If it’s just a tiny part of the tooth missing and you’re not experiencing much pain, it’s likely a cosmetic issue that you can handle at home temporarily.
- Large Chip: If you notice that the chip is deep, jagged, or exposes the inner part of the tooth (the pulp), you should seek immediate professional help to prevent infection or further damage.
- Pain: If you feel sharp pain when chewing or sensitivity to hot or cold, this could indicate a more severe issue, and I recommend contacting a dentist right away.
2. Rinse Your Mouth with Warm Water
After realizing that my chip wasn’t too severe, I rinsed my mouth with warm water to clean the area. This is an important step because it helps remove any debris that might be stuck in the chip, reducing the risk of infection. I used a saltwater solution for added antibacterial benefits. Saltwater helps keep the area clean and can help prevent bacteria from causing an infection in the exposed area of the tooth.
Here’s how to do it:
- Mix about half a teaspoon of salt in a glass of warm water.
- Swish the solution around your mouth for about 30 seconds, making sure it covers the chipped area.
- Spit out the solution and avoid drinking or eating for at least 30 minutes afterward.
3. Apply a Cold Compress to Reduce Swelling
If you experience any swelling or discomfort after chipping your tooth, a cold compress can help reduce inflammation and numb the area. I’ve found that applying a cold compress to the outside of my cheek for 15-20 minutes provided significant relief. This also helped me manage any discomfort from the chipped tooth.
To apply a cold compress:
- Wrap a few ice cubes in a clean cloth or use a gel ice pack.
- Place it on the outside of your cheek where the chipped tooth is.
- Leave it on for about 15-20 minutes at a time. You can repeat this a few times a day if necessary to alleviate discomfort.
4. Use Temporary Dental Filling Material
If the chip is causing discomfort or if the tooth has a rough edge that could irritate your tongue or gums, using a temporary dental filling material can help protect the tooth until you can see a dentist. These over-the-counter products are available at most drugstores, and they’re designed for emergency situations like mine when I needed to prevent further damage and ease the discomfort.
Here’s how I used a temporary dental filling:
- Clean the area thoroughly with warm water and dry it gently with a clean cloth.
- Follow the instructions on the temporary filling kit. Typically, you’ll need to mold a small amount of the filling material and place it over the chipped area.
- Be sure to avoid eating or drinking anything for at least an hour to allow the filling to set properly.
5. Avoid Certain Foods and Drinks
While waiting for your dental appointment, it’s important to be mindful of the foods and drinks you consume. A chipped tooth is more vulnerable to damage, and you don’t want to make the problem worse. I made sure to avoid anything too hard, sticky, or crunchy, as it could further damage the tooth or cause discomfort.
Here are some foods to avoid:
- Hard Foods: Avoid nuts, hard candy, ice, or anything that requires a lot of pressure to chew.
- Sticky Foods: Chewing gum, caramel, or toffee can stick to the chipped area and potentially pull at it.
- Hot and Cold Drinks: If your tooth is sensitive, try to avoid drinking hot or cold beverages, as they can cause discomfort.
6. Book an Appointment with Your Dentist
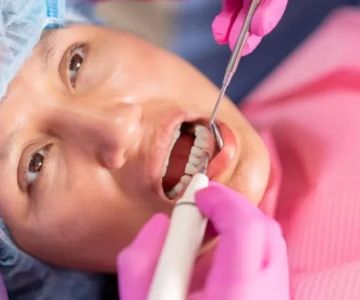
Even if your chipped tooth feels okay after applying a temporary solution and taking precautions, it’s crucial to book an appointment with your dentist as soon as possible. A chipped tooth can lead to further complications if not properly treated. I learned this the hard way after waiting too long to address a small chip, which eventually led to a more serious issue that required a root canal.
When I visited the dentist, they used bonding material to repair the chip and restore the tooth’s appearance. In some cases, more advanced treatment such as crowns or veneers may be needed, depending on the severity of the chip. The earlier you seek professional help, the better your chances of preserving the tooth and preventing further issues.
7. Conclusion: Take Action When You Chip a Tooth
Having a chipped tooth can be alarming, but there are plenty of steps you can take at home to treat the issue and reduce discomfort until you see a dentist. From rinsing with warm water to using temporary filling material, these simple home remedies can help protect your tooth and keep you comfortable. However, remember that professional care is essential to ensure that your tooth is properly repaired and to avoid future complications.
If you find yourself dealing with a chipped tooth, I highly recommend reaching out to your dentist for guidance and treatment. For more information on dental care and emergency solutions, visit Dentistry Toothtruth for the best recommendations and services available to you.


 South Jersey Dental0.0 (0 review)
 Natural Smiles of Orlando5.0 (126 review)
 Innovative Dentistry of Valley Forge5.0 (228 review)
 Garner Orthodontics4.0 (334 review)
 Clear Dentistry - Dr. Laura Carvalho, DMD4.0 (34 review)
 Harborside Dental4.0 (32 review)
 The Importance of Oral Health Education During Pregnancy for a Healthy Pregnancy
 Best Tips for Brushing Your Teeth Properly for Healthy Gums: Essential Techniques for Oral Health
 Why Skipping Dental Checkups Can Lead to Bigger Oral Health Problems
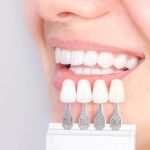 Advantages of Porcelain Dental Restorations
 How Can Diabetes Cause Tooth and Gum Problems? Preventing and Managing Oral Health Issues
 Healthy Habits for Promoting Good Oral Health and Hygiene: Tips for a Healthy Smile