
- 1-overview-why-safe-teeth-whitening-matters
- 2-whitening-strips-and-gels
- 3-custom-tray-whitening-kits
- 4-natural-remedies-and-diy-methods
- 5-enzyme-kits-led-devices
- 6-common-mistakes-and-risks
- 7-real-life-success-stories
- 8-maintenance-and-long-term-care
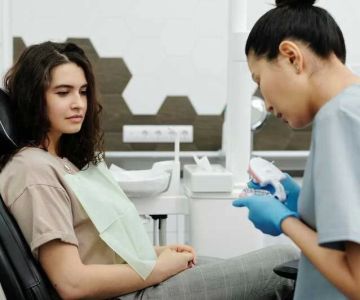
1. Overview: Why Safe Teeth Whitening Matters
A bright, white smile boosts confidence and leaves a lasting impression. Yet rushing into harsh bleaching methods can damage enamel, irritate gums, and lead to uneven results. Learning how to whiten teeth safely at home ensures you achieve a radiant smile without compromising oral health. Enamel erosion, tooth sensitivity, and gum inflammation can all result from improper whitening techniques. By choosing evidence-based products and following recommended protocols, you protect your teeth’s natural barrier and maintain long-term dental wellness.
In the United States, over 45 million people use at-home whitening products annually. Market research shows a shift toward gentler formulations—lower peroxide concentrations, enamel-strengthening additives, and devices that monitor application time. These advances help consumers avoid the pitfalls of “one-size-fits-all” approaches and tailor treatments to their unique sensitivity levels and lifestyle routines. Whether you sip coffee daily, indulge in red wine, or simply want to reverse years of staining, safe at-home whitening can restore brightness while keeping your smile—and dentist—happy.
2. Whitening Strips and Gels: Easy, Controlled Application
Whitening strips and gels represent the most popular at-home approach. Strips coated with hydrogen peroxide or carbamide peroxide adhere directly to tooth surfaces, releasing bleaching agents in a controlled fashion. Typical protocols involve 10–30 minute daily applications for two weeks, yielding visible results without frequent dental visits.
2.1 Choosing Your Strength
Most over-the-counter strips contain 6%–10% hydrogen peroxide. Sensitive users may prefer 5% solutions applied for longer durations, while those seeking faster results can opt for 10% but must watch for gum irritation. Always follow manufacturer instructions, and discontinue use if discomfort persists beyond 24 hours.
2.2 Avoiding Common Pitfalls
Improper strip placement—overlapping on gum tissue—can cause chemical burns. Trim excess material with clean scissors, and press strips snugly against teeth. Store strips in a cool, dry place to maintain potency; heat accelerates peroxide breakdown, reducing effectiveness.
3. Custom Tray Whitening Kits: Personalized Precision
Custom tray kits, often available through dentists or specialty retailers, provide tailored whitening. You create an impression of your teeth, send it to the lab, and receive fitted trays that hold bleaching gel against enamel evenly. This precise seal minimizes contact with soft tissues and allows for uniform whitening.
3.1 Professional vs. DIY Impression Kits
Dental-office kits typically use 15%–20% carbamide peroxide, yielding fast results in one week. Retail impression kits cap at 10% peroxide for safety. While results are slower, these kits still outperform generic strips by ensuring gel reaches every tooth surface without excess pooling.
3.2 Application Protocols
Fill trays with a thin ribbon of gel—too much can overflow and irritate gums; too little yields uneven color. Wear trays for 30–60 minutes daily, or overnight if sensitivity is low. Rinse trays thoroughly after each use, and store in a ventilated case to prevent mold growth.
4. Natural Remedies and DIY Methods: A Cautious Approach
Many seek household solutions to learn how to whiten teeth safely at home with pantry staples. While cost-effective, these methods carry varying degrees of scientific support and risk.
4.1 Baking Soda and Hydrogen Peroxide Paste
A paste of baking soda mixed with a few drops of hydrogen peroxide can remove surface stains through mild abrasion and oxidation. Use once a week—overuse wears down enamel. Don’t exceed a 1:1 ratio, and rinse thoroughly to eliminate residual peroxide.
4.2 Oil Pulling: Fact vs. Fiction
Swishing coconut or sesame oil for 10–15 minutes may reduce bacteria and plaque, leading to a subtly brighter smile. Scientific evidence is limited, and oil pulling should complement—not replace—brushing, flossing, and proven whitening products.
5. Enzyme-Based Gels and LED Devices: Tech-Enhanced Whitening
Innovations in oral care have introduced enzyme-based whitening gels and LED-accelerated kits. These products leverage natural enzymes—papain, bromelain—and light activation to boost peroxide efficacy.
5.1 How Enzymes Assist Whitening
Papain (from papaya) and bromelain (from pineapple) break down protein pellicles that trap chromogens—the molecules behind stains. When combined with low-strength peroxide, enzymes facilitate faster stain removal with minimal sensitivity.
5.2 LED Light Activation
At-home LED devices emit blue light wavelengths that accelerate peroxide breakdown on the tooth surface. Sessions typically last 10–20 minutes, and when paired with 5%–6% peroxide gels, can lift stains in under a week. Ensure device mouthpieces fit comfortably and clean them after each use to prevent bacterial buildup.
6. Common Mistakes and Risks to Avoid
Even with safe products, user error can lead to setbacks. Understanding frequent missteps helps preserve enamel and gum health.
6.1 Over-Whitening and Enamel Damage
Excessive bleaching—more than recommended frequency—thins enamel, increasing sensitivity and risk of cavities. Stick to label guidelines or dentist recommendations, and halt treatment if you notice translucency at tooth edges.
6.2 Ignoring Underlying Dental Issues
Whitening masks existing problems—cracks, decay, or fillings—that don’t lighten with bleaching. Address cavities and replace defective restorations before whitening to avoid uneven color and pain.
7. Real-Life Success Stories
Hearing from others can guide your journey. Here are two U.S.-based anecdotes illustrating thoughtful at-home whitening.
7.1 Laura’s Gradual Transformation
Living in Chicago, Laura tried over-the-counter strips but suffered gum irritation. She switched to a dentist-recommended 10% custom tray kit, wearing trays for 45 minutes nightly. Within three weeks, her teeth brightened three shades, and sensitivity remained minimal.
7.2 Diego’s LED Boost
College student Diego used a 6% peroxide gel with LED activation during finals week. He appreciated the short, 15-minute sessions and saw a noticeable change without interrupting study sessions. Pairing LED with enzyme mouthwash reduced plaque buildup and refreshed his smile.
8. Maintenance and Long-Term Care
Teeth whitening is not a one-time event. To preserve your results:
8.1 Daily Oral Hygiene
Brush twice with a fluoride toothpaste, floss daily, and rinse with an alcohol-free mouthwash. Consider whitening toothpaste with silica for gentle stain removal.
8.2 Dietary Considerations
Limit coffee, tea, red wine, and dark berries. When indulging, use a straw for beverages and rinse with water afterward. For red-wine lovers, swishing water post-glass reduces chromogen contact time.
8.3 Periodic Touch-Ups
Schedule touch-up treatments every 3–6 months, using strips or custom trays at half the original duration. Regular dental cleanings at Dentistry Toothtruth also remove surface stains and allow your dentist to monitor enamel integrity.


 Nice Dental Care4.0 (24 review)
 Dr. Yung T. Lang, DDS4.0 (6 review)
 Dover Dental Center4.0 (272 review)
 Sylmar Dental & Braces5.0 (111 review)
 River Run Dental4.0 (356 review)
 RiverRock Dental4.0 (157 review)
 The Importance of Oral Health Education During Pregnancy for a Healthy Pregnancy
 Best Tips for Brushing Your Teeth Properly for Healthy Gums: Essential Techniques for Oral Health
 Why Skipping Dental Checkups Can Lead to Bigger Oral Health Problems
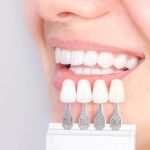 Advantages of Porcelain Dental Restorations
 How Can Diabetes Cause Tooth and Gum Problems? Preventing and Managing Oral Health Issues
 Healthy Habits for Promoting Good Oral Health and Hygiene: Tips for a Healthy Smile