
How to Treat a Chipped Tooth at Home: Practical Tips and Remedies
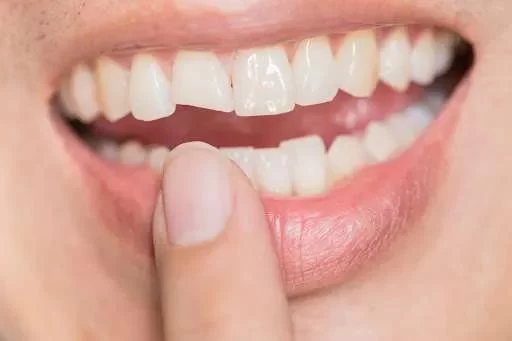
I’ll never forget the day I chipped my tooth. It was during a casual game of basketball with friends, and while I was trying to make a fast move, my tooth collided with another player’s elbow. Immediately, I felt a sharp pain, and when I rushed to the bathroom, I saw a noticeable chip in my tooth. My heart sank. I wasn’t sure whether I should rush to the dentist or if it was something I could handle at home. After some research and a few tips from my dentist, I learned there were steps I could take at home to ease the pain and treat the chip until I could see a professional. In this article, I’ll share what I learned about how to treat a chipped tooth at home and when to seek professional help.
1. Assessing the Severity of the Chip
The first thing I learned after chipping my tooth was to assess the damage. I quickly realized that not all chips are the same. The severity of the chip could vary depending on whether it’s a small fracture or a more significant break. I took a good look at the chipped area in the mirror and felt around with my tongue. Here’s what I learned:
1.1. Minor Chips
If the chip is small and there’s no pain or sensitivity, you may be able to treat it at home temporarily. I noticed that my chip was minor and didn’t cause much discomfort, so I decided to try a few home remedies to manage it until I could get to the dentist.
1.2. Larger Chips or Painful Breaks
If the chip caused significant pain, exposed the tooth’s pulp, or if the tooth was cracked down to the root, I knew I would need to seek immediate dental attention. A more serious fracture could lead to infection, which would require more intensive treatment such as a crown or root canal. Fortunately, my chip wasn’t severe, but I quickly learned that seeking professional help is crucial when the damage is substantial.
2. Temporary Pain Relief for a Chipped Tooth
After determining that my chip was relatively minor, I wanted to address the pain and sensitivity that came with it. I found a few ways to reduce the discomfort until I could get to my dentist:
2.1. Use Cold Compresses
The first thing I did was apply a cold compress to the outside of my mouth. I used a clean cloth wrapped around some ice and gently pressed it against the area where the chip occurred. This helped numb the pain and reduce any swelling around the area. I kept the compress on for about 15 minutes at a time, which provided temporary relief.
2.2. Over-the-Counter Pain Relief
I also used over-the-counter pain relievers like ibuprofen to help manage any discomfort. Ibuprofen not only relieved the pain but also helped reduce inflammation, which was especially useful in the first few hours after chipping my tooth. I followed the dosage instructions on the packaging, and this provided some comfort while I waited for my dental appointment.
3. Preventing Further Damage at Home
One of my biggest concerns was accidentally making the chip worse before I could see a dentist. I learned that there were steps I could take to prevent additional damage and to protect my chipped tooth in the meantime.
3.1. Avoiding Hard Foods
One of the first things I did was avoid eating hard or crunchy foods that might cause further harm to my tooth. I stuck to soft foods like yogurt, mashed potatoes, and smoothies to avoid putting any pressure on the chipped area. Chewing hard foods could cause the chip to worsen or even break off more of the tooth.
3.2. Be Mindful of Temperature Sensitivity
Since my chipped tooth was sensitive to hot and cold, I made sure to avoid foods or drinks that were too hot or cold. I tried to drink lukewarm beverages and avoided ice cream or hot tea, which could make the pain worse. Being cautious with temperature also helped me avoid irritation to the exposed area of the tooth.
4. Temporary Solutions to Cover the Chip
While I was waiting for my dental appointment, I wanted to find a way to protect my chipped tooth and prevent any sharp edges from irritating my tongue or the inside of my mouth. I found a few temporary at-home solutions that helped make the tooth more comfortable:
4.1. Dental Wax
I decided to use dental wax, which I found at my local pharmacy. Dental wax is commonly used by people with braces, but it worked perfectly for covering my chipped tooth. I took a small amount of the wax and pressed it over the rough edge of the chip. This helped to smooth out the sharp edges and made it easier to eat and talk without irritation.
4.2. Temporary Filling Material
For a more secure option, I used a temporary filling material that I purchased from the pharmacy. These materials are designed to help seal a chipped tooth temporarily and protect it until you can see a dentist. I followed the instructions carefully and applied the filling material to the chipped area. This helped to protect the tooth and made me feel more comfortable, though I knew it was a short-term solution.
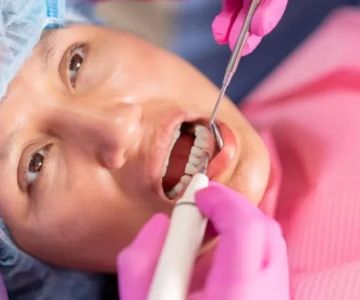
5. When to Seek Professional Help
While these home remedies helped me manage the situation, I knew that a chipped tooth still required professional care. I scheduled an appointment with my dentist as soon as possible. Here are some signs that you should seek dental attention immediately:
5.1. Severe Pain or Bleeding
If you experience intense pain or bleeding after chipping your tooth, it’s important to see a dentist immediately. Pain can indicate damage to the tooth’s pulp or nerves, which may require a root canal or other treatment.
5.2. Large Fractures or Exposed Nerves
If the chip is large and exposes the nerve of your tooth, it is crucial to visit a dentist as soon as possible. Exposed nerves can cause intense pain and leave your tooth vulnerable to infection. A dentist will be able to clean and seal the exposed area to prevent further complications.
5.3. Cosmetic Concerns
If you’re concerned about the appearance of your chipped tooth, a dentist can provide options like dental bonding or veneers to restore the shape and look of your tooth. For a more permanent and aesthetically pleasing result, a dentist can offer professional treatments that will make your tooth look as good as new.
Chipping a tooth can be a frightening experience, but with the right knowledge and care, it’s possible to manage the situation at home until you can see a dentist. While home remedies can help with pain relief, preventing further damage, and protecting the tooth temporarily, visiting a dentist is the best way to ensure that your tooth is properly treated. The key is not to panic, but to stay proactive about your oral health and get the help you need when the time comes.


 Dr. David R. Resch DDS0.0 (0 review)
 Gig Harbor Family Dentistry3.0 (38 review)
 Dental Place Westborough4.0 (152 review)
 Anderson Dental Professionals5.0 (253 review)
 Watson Family Dentistry3.0 (6 review)
 Smile Doctors Orthodontics - Canton4.0 (181 review)
 The Importance of Oral Health Education During Pregnancy for a Healthy Pregnancy
 Best Tips for Brushing Your Teeth Properly for Healthy Gums: Essential Techniques for Oral Health
 Why Skipping Dental Checkups Can Lead to Bigger Oral Health Problems
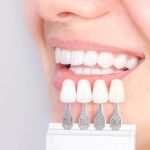 Advantages of Porcelain Dental Restorations
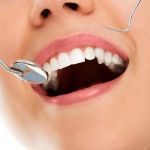 How Can Diabetes Cause Tooth and Gum Problems? Preventing and Managing Oral Health Issues
 Healthy Habits for Promoting Good Oral Health and Hygiene: Tips for a Healthy Smile