
How I Care for My Braces and Keep My Smile Beautiful
Getting braces was a big step in my journey toward a more confident smile. As someone who had long been self-conscious about my crooked teeth, I was excited about the prospect of straightening them out. However, I soon realized that taking care of my braces was more involved than I had initially thought. There are so many aspects of maintaining your braces and keeping your smile beautiful, from brushing and flossing to avoiding certain foods. After a few months of wearing braces, I discovered a routine that worked for me and kept my teeth clean and my smile on track. In this article, I’ll share the tips and tricks I’ve learned to help you care for your braces and ensure that your smile stays healthy throughout the treatment process.
1. The Basics of Braces Care
When I first got my braces, the orthodontist gave me a list of do’s and don’ts. At first, it seemed overwhelming, but as time passed, I found that sticking to some basic principles helped me keep my teeth in great shape and avoid problems. The key to caring for braces is to stay consistent with your routine and pay attention to the little details that can make a big difference in the long run.
1.1. Brushing and Flossing with Braces
Brushing and flossing become a bit more complicated with braces, but it’s essential to do it properly to prevent cavities, gum disease, and staining. I was advised to brush my teeth after every meal to remove food particles that can get stuck in the braces. I used a soft-bristled toothbrush to avoid damaging the wires and brackets. For flossing, I initially struggled with traditional floss, but I discovered floss threaders that made it much easier to get between the wires and clean effectively. It’s important to clean every surface of your teeth, including the areas around the brackets, to ensure your smile stays healthy.
1.2. The Right Toothpaste and Mouthwash
When I started wearing braces, my orthodontist recommended using a fluoride toothpaste to help strengthen my enamel and prevent cavities. Fluoride helps protect against tooth decay, which is especially important when you’re wearing braces, as food particles can get trapped in hard-to-reach places. I also incorporated an alcohol-free mouthwash into my routine. The mouthwash not only helped with freshening my breath but also reduced bacteria in my mouth, helping to prevent gum disease.
2. Foods to Avoid with Braces
One of the most challenging aspects of wearing braces for me was avoiding certain foods that could damage the wires or get stuck in the braces. Early on, I learned which foods could cause issues, and I made sure to avoid them. It wasn’t always easy, especially when I was out with friends or at family gatherings, but over time I became more accustomed to making better food choices.
2.1. Hard and Sticky Foods
Hard foods like nuts, hard candies, and ice can potentially damage the brackets or wires, so I made sure to avoid them. Sticky foods, such as caramel, gum, and taffy, can get stuck in the braces and are difficult to clean out, leading to plaque buildup and possible cavities. I found it helpful to carry some alternatives with me, like soft fruits, yogurt, and smoothies, which were braces-friendly and still delicious.
2.2. Crunchy Vegetables
While vegetables are healthy and essential to a balanced diet, some raw veggies, such as carrots and celery, can be tough on your braces. I learned to cut them into smaller pieces before eating them, which made chewing more manageable without risking damage to my braces. I also made sure to eat softer vegetables, like cooked spinach or peas, to avoid unnecessary stress on my brackets.
2.3. Sugary and Acidic Foods
Foods high in sugar or acid can contribute to tooth decay, especially when they get stuck in your braces. Soda, citrus fruits, and sugary snacks should be consumed sparingly. When I craved something sweet, I would choose healthier options like fruit, and I always made sure to brush my teeth afterward. This helped me minimize the risk of cavities during my treatment.
3. Dealing with Discomfort and Irritation
At first, I experienced some discomfort and irritation after my braces were tightened or adjusted. It’s a common part of the process as your teeth gradually shift into their new positions. I learned a few tricks to deal with the discomfort, and after a while, I became more accustomed to the process.
3.1. Using Orthodontic Wax
One of the best pieces of advice I received was to use orthodontic wax to cover any brackets or wires that were causing irritation to the inside of my mouth. I would roll a small amount of wax into a ball and place it over the problematic area. This created a smooth surface and helped prevent sores from forming in my cheeks or gums. I always kept a little container of wax in my bag for emergencies.
3.2. Over-the-Counter Pain Relief
For more significant discomfort, I found that over-the-counter pain relief medications, like ibuprofen, worked wonders. I would take a dose after an adjustment appointment if I felt sore. However, I made sure to follow the recommended dosage instructions, as overuse can lead to unwanted side effects. The discomfort typically lasted only a couple of days, so I didn’t need pain relief for long.
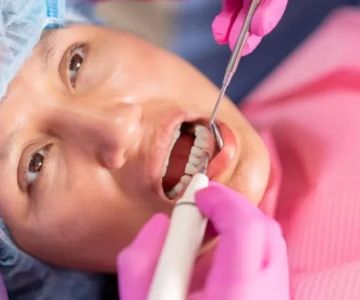
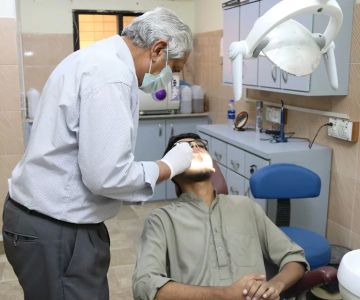
4. Regular Check-ups with Your Orthodontist
Maintaining regular appointments with my orthodontist was essential for ensuring that my braces were working as they should. During each visit, my orthodontist checked the alignment of my teeth and made adjustments to the braces to keep things on track. These appointments were a great time to ask questions and get advice about any concerns I had regarding the progress of my treatment.
4.1. Timely Adjustments
At first, I wasn’t sure how long my treatment would take, but my orthodontist provided a clear timeline and updated it regularly during each visit. Timely adjustments were essential for maintaining the pace of my treatment, and I was always excited to see the improvements in my smile after each visit.
4.2. Keep Track of Progress
Throughout my braces treatment, I kept a record of the changes in my teeth by taking pictures every few weeks. This helped me stay motivated as I saw the gradual improvements in my smile. I highly recommend doing this—it’s a great way to see how far you’ve come and get excited about the final results!


 Eastern Dental4.0 (1033 review)
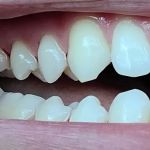 Stephanie Dental Group4.0 (250 review)
 Lakewood Dental Care4.0 (12 review)
 Fletcher Heights Dental Care, PC4.0 (55 review)
 Dental Specialty Center of Naples4.0 (59 review)
 Dr. Joe Gordon, DDS4.0 (10 review)
 The Importance of Oral Health Education During Pregnancy for a Healthy Pregnancy
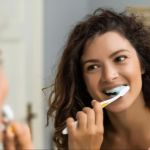 Best Tips for Brushing Your Teeth Properly for Healthy Gums: Essential Techniques for Oral Health
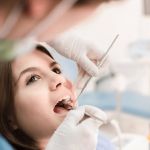 Why Skipping Dental Checkups Can Lead to Bigger Oral Health Problems
 Advantages of Porcelain Dental Restorations
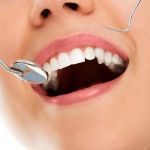 How Can Diabetes Cause Tooth and Gum Problems? Preventing and Managing Oral Health Issues
 Healthy Habits for Promoting Good Oral Health and Hygiene: Tips for a Healthy Smile