
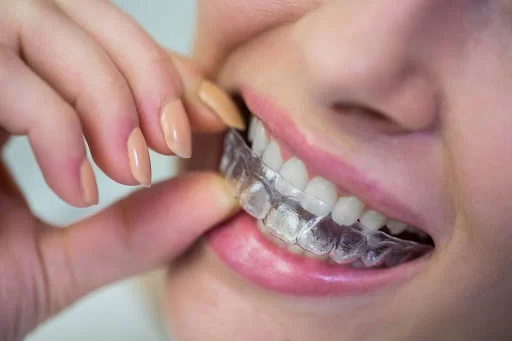
How to Use Dental Insurance for Braces: A Step-by-Step Guide
If you're considering braces to straighten your teeth, one of the first questions that may come to mind is how to make the treatment affordable. Braces can be a significant investment, and many people wonder if dental insurance can help cover the costs. The good news is that in many cases, dental insurance can be used to pay for braces, but understanding how to navigate your coverage can be a bit tricky. In this article, I will walk you through the process of using dental insurance for braces, helping you maximize your benefits and make the most out of your coverage.
1. Understanding Your Dental Insurance Coverage
Before diving into how dental insurance can help with braces, it's important to first understand what your plan covers. Not all dental insurance plans are the same, and the extent of coverage for orthodontics can vary greatly between plans. Some plans offer extensive coverage for braces, while others may have limited or no coverage at all.
Typically, most dental insurance plans cover a portion of the cost of braces for children and teenagers, but adult orthodontics may be excluded or only partially covered. It's essential to read the fine print of your policy or contact your insurance provider to clarify the details of your coverage. If your plan does cover orthodontics, there will likely be a few key things to understand:
- Orthodontic Coverage Limits: Many plans have a lifetime maximum benefit for orthodontics, which means they will only pay up to a certain amount for braces over your lifetime.
- Age Limitations: Some plans may limit coverage to minors or children under a certain age, which can affect whether your adult orthodontic treatment will be covered.
- Waiting Periods: Some dental plans have a waiting period before orthodontic benefits kick in, which could delay the start of your treatment.
- Co-payments and Deductibles: Even if your insurance covers braces, you may still have to pay a co-payment or deductible depending on your plan's terms.
2. How to Verify If Braces Are Covered by Your Insurance
Now that you have a basic understanding of how dental insurance works, it's time to verify whether your specific plan covers braces. Here are the steps you should take:
- Contact Your Insurance Provider: Reach out to your dental insurance provider to ask about your orthodontic coverage. Request a clear breakdown of what is covered, any limitations, and the amount of coverage for braces.
- Review Your Plan’s Terms: Carefully review your policy to check if orthodontic treatments like braces are included, and if so, under what conditions (age limits, waiting periods, etc.).
- Get an Orthodontic Consultation: Many orthodontists will provide an initial consultation where they will discuss treatment options and provide an estimate of the cost of braces. Bring your insurance information to this appointment to get an estimate of how much the insurance will cover.
- Ask for a Pre-Treatment Estimate: Before starting treatment, ask your orthodontist to submit a pre-treatment estimate to your insurance company. This will give you a clearer picture of the amount your insurer will cover and what your out-of-pocket costs will be.
3. Using Your Dental Insurance for Braces: The Process
Once you've confirmed that your dental insurance covers braces, it's time to move forward with the treatment. Here’s a step-by-step guide on how to use your dental insurance for braces:
Step 1: Find an In-Network Orthodontist
Many insurance plans have a network of approved providers. Choosing an orthodontist who is within your insurance plan's network will help you save money. In-network providers have agreed to accept lower fees for services, which can lower your out-of-pocket costs for braces.
Step 2: Schedule a Consultation
Once you've found an in-network orthodontist, schedule a consultation. During this appointment, the orthodontist will evaluate your teeth, discuss treatment options, and provide a cost estimate for braces. Be sure to ask about financing options, as some orthodontists offer payment plans to make braces more affordable.
Step 3: Submit Pre-Treatment Estimates to Your Insurance
After your consultation, your orthodontist will likely submit a pre-treatment estimate to your insurance company. This is a detailed breakdown of the expected costs for your braces, including any insurance-covered amounts. Once the insurance company reviews the estimate, they will send you a letter explaining how much they will pay and how much you will need to pay out of pocket.
Step 4: Review Insurance Coverage and Payment Plans
Once you receive the insurance payment breakdown, review it carefully to understand how much your insurance covers and what your responsibility will be. Many orthodontists offer financing options, which can help you pay the remaining balance in affordable monthly payments.
4. What to Do If Your Insurance Does Not Cover Braces
If your dental insurance does not cover braces, don't worry! There are still ways to make the treatment more affordable:
- Payment Plans: Many orthodontists offer flexible payment plans that allow you to spread the cost of treatment over several months or years.
- Health Savings Accounts (HSAs): If you have an HSA, you can use those funds to pay for braces on a pre-tax basis, which can help reduce the overall cost.
- Flexible Spending Accounts (FSAs): Some FSAs allow you to use funds for orthodontic treatment, so check if your plan offers this option.
- Care Credit: Care Credit is a healthcare credit card that many orthodontists accept, allowing you to finance your braces and pay over time.
5. Success Story: How Insurance Helped Me Get Braces
Let me share a quick story from my own experience. I had been struggling with misaligned teeth for years but had always put off getting braces because of the high cost. When I finally decided to take the plunge, I was pleasantly surprised to learn that my dental insurance would cover a significant portion of the cost of braces.
After reviewing the details of my policy, I found out that my plan covered 50% of orthodontic treatment, with a lifetime maximum benefit of $2,000. I was able to finance the remaining balance with a payment plan through the orthodontist's office, which made the entire process manageable. If it weren't for my insurance coverage, I wouldn't have been able to afford the treatment, so I’m extremely grateful for the assistance it provided.
6. Tips for Maximizing Your Dental Insurance for Braces
Here are a few tips for getting the most out of your dental insurance when it comes to braces:
- Start Early: The earlier you start planning for braces, the more time you'll have to figure out your insurance coverage and save for the remaining balance.
- Stay In-Network: Choosing an in-network orthodontist will typically save you money compared to out-of-network providers.
- Ask About Discounts: Some orthodontists offer discounts for paying upfront or for multiple family members getting treatment at the same time. Be sure to ask!
With a little preparation and careful planning, you can use your dental insurance to make getting braces more affordable. If you’re ready to start the process, reach out to a local orthodontist and see how they can help you. And remember, if you’re in need of any additional assistance or have questions about your dental care, Dentistry Toothtruth is here to help!


 Dental Arts of Totowa4.0 (80 review)
 Groton Dental Group4.0 (288 review)
 Fox Valley Endodontic Specialists4.0 (4 review)
 Dr. Bruce King DDS4.0 (112 review)
 Elegant Smiles of Sea Girt4.0 (130 review)
 Advanced Oral Surgery Orthodontics and Pediatric Dentistry | Cirugía Bucal Avanzada, Ortodoncia y Odontología Pediátrica4.0 (512 review)
 The Importance of Oral Health Education During Pregnancy for a Healthy Pregnancy
 Best Tips for Brushing Your Teeth Properly for Healthy Gums: Essential Techniques for Oral Health
 Why Skipping Dental Checkups Can Lead to Bigger Oral Health Problems
 Advantages of Porcelain Dental Restorations
 How Can Diabetes Cause Tooth and Gum Problems? Preventing and Managing Oral Health Issues
 Healthy Habits for Promoting Good Oral Health and Hygiene: Tips for a Healthy Smile